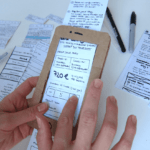
Paper Prototyping
Paper prototypes communicate and shape an idea early on by making it real and testing it early with your users.
Detailed steps
1. DEFINE
Settle on an idea to develop that you have already storyboarded and know how should work.
2. PLAN
From your storyboard start to flesh out what the product experience would look like to deliver on your experience. Ask questions. What interactions would the user need to have, where does your product end and real life begin? What are the questions you have, the assumptions you are making in this? A paper prototype can be great to shape an idea but can also be a great way to test these early questions about how to design a solution. Think about what your goal is for your prototype before you start creating it. Select one scenario that can aide you in this goal and a few key tasks to focus on developing further.
3. CREATE
Use the paper and pen to draw out each interaction screen for the tasks/scenario you have chosen. Not every screen has to be redone, If small things change, use cut outs to be able to move small changes in place. Continue to walk through your prototype until it makes sense to you and your team. And then go test it with users. You can either present your paper prototype as is or you can make it easier to share by incorporating it with links in programs like keynote or pop.
4. SHARE & TEST
You are now ready to reap the benefits of prototyping earlier. You can use your new prototype to test your solution with real users and gain buy-in and understanding by sharing with the relevant stakeholders.


 Previous Post
 Next Post